by Lynn Paolillo
 ith their signature folded ears, the Scottish Fold is one of the most recognizable cat breeds to come to the grooming salon. Typically adorable and even-tempered, they can also be incredibly hairy. Moose and Cooper are a pair of Scottish Folds that I groom every six to eight weeks in my salon and today is their spa day!
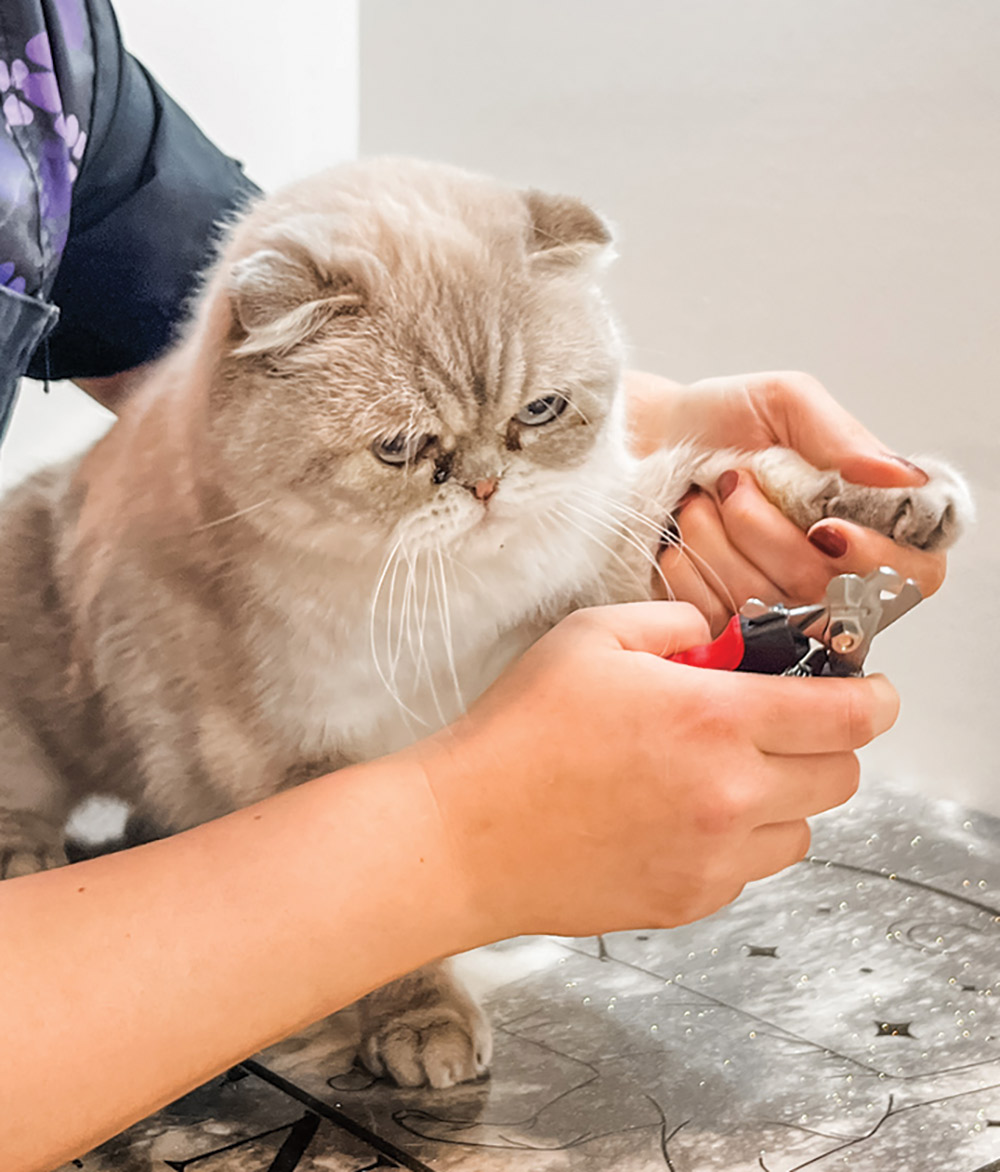
FIG 1) Every cat groom should start with trimming sharp nails. Hold each foot in your hand and use your thumb to gently push above each “knuckle.” This will extend the nail out so it can be more easily cut with nail trimmers.

FIG 2) Some Scottish Folds have stiff or even arthritic legs, so be especially gentle when handling these cats. A hug from behind keeps Moose in his comfort position while I move the foot as little as possible while trimming nails.
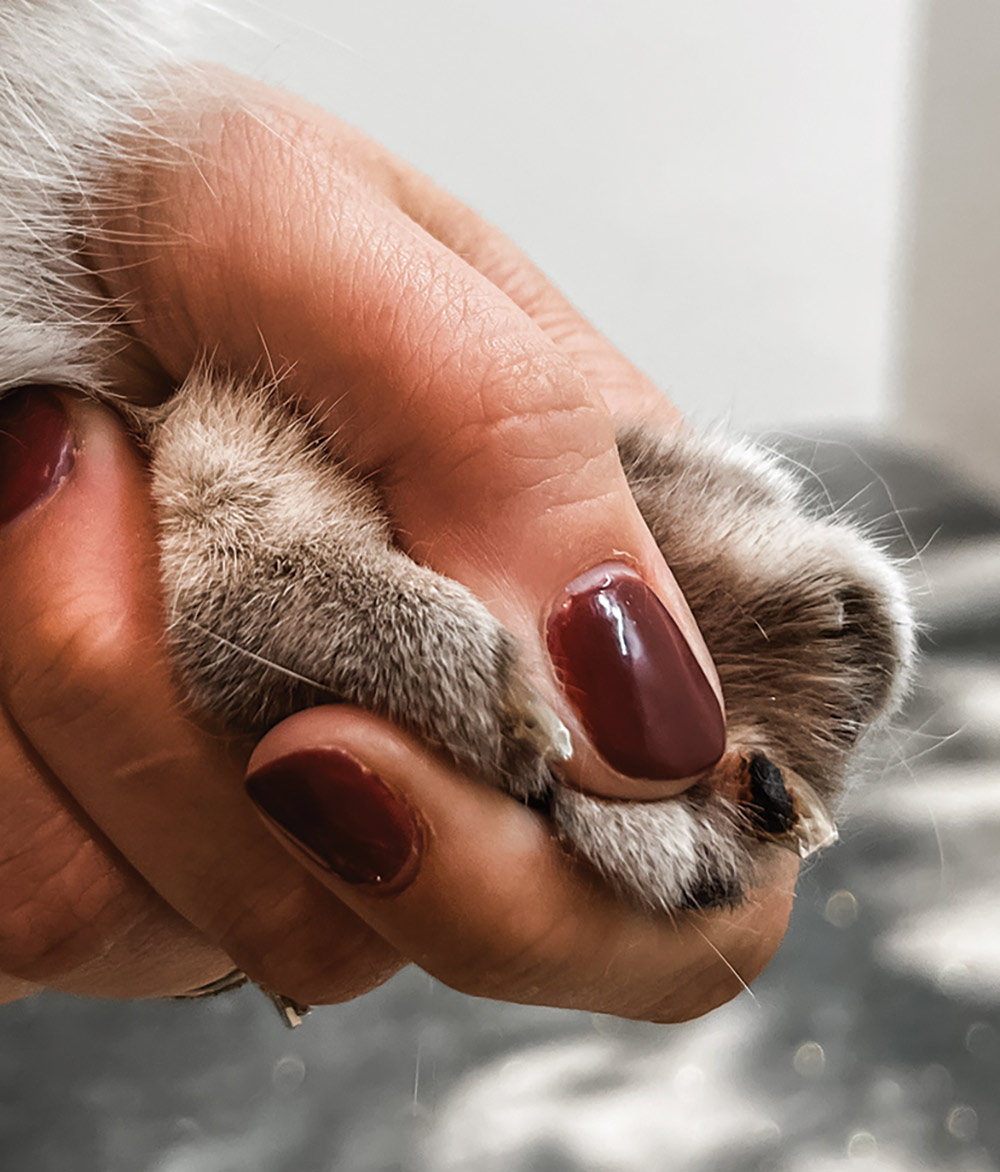
FIG 3) Black gunk around the base of the nail is an accumulation of skin oils. If there is additional redness or irritation around the nail bed, then it should be recommended for a vet visit. Otherwise, we’ll do some extra cleaning to remove the buildup during the bath.
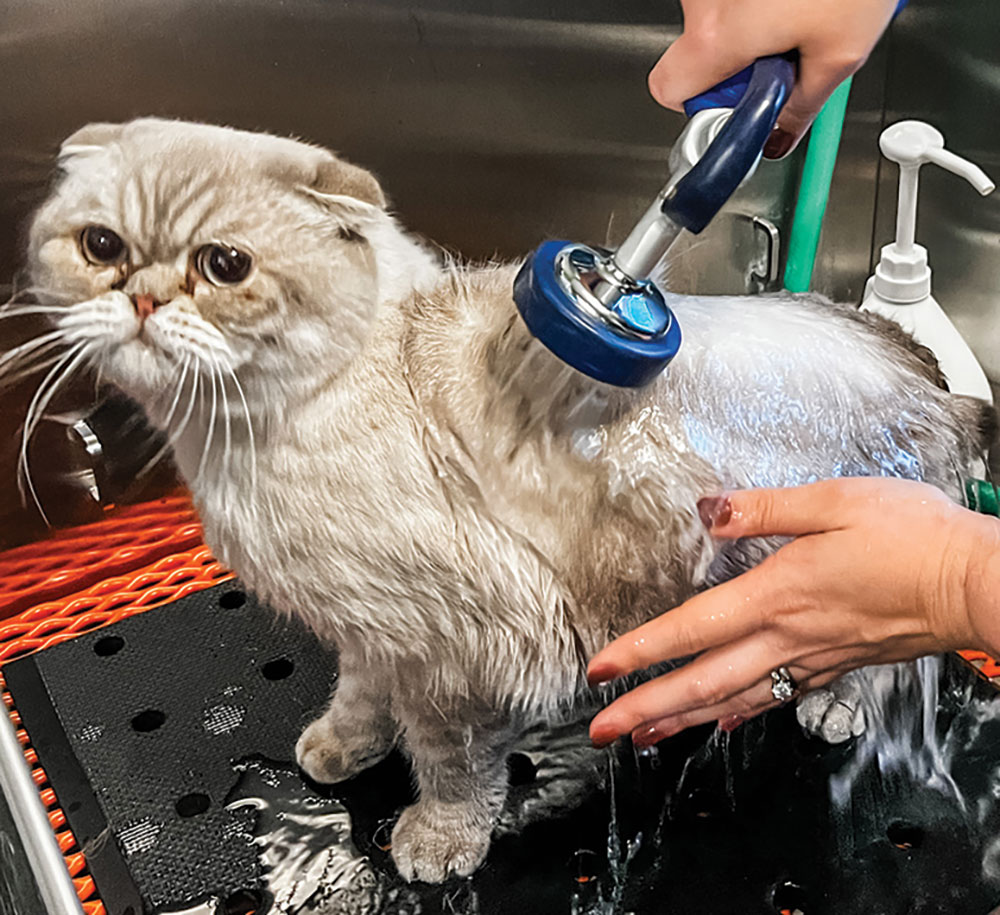
FIG 4) When introducing a cat to water, hold the nozzle close to their skin and control the water flow to start at a lower pressure. I prefer to start on the chest or sides to minimize any meltdowns. Get the coat thoroughly saturated with water in order to penetrate their dense coat.
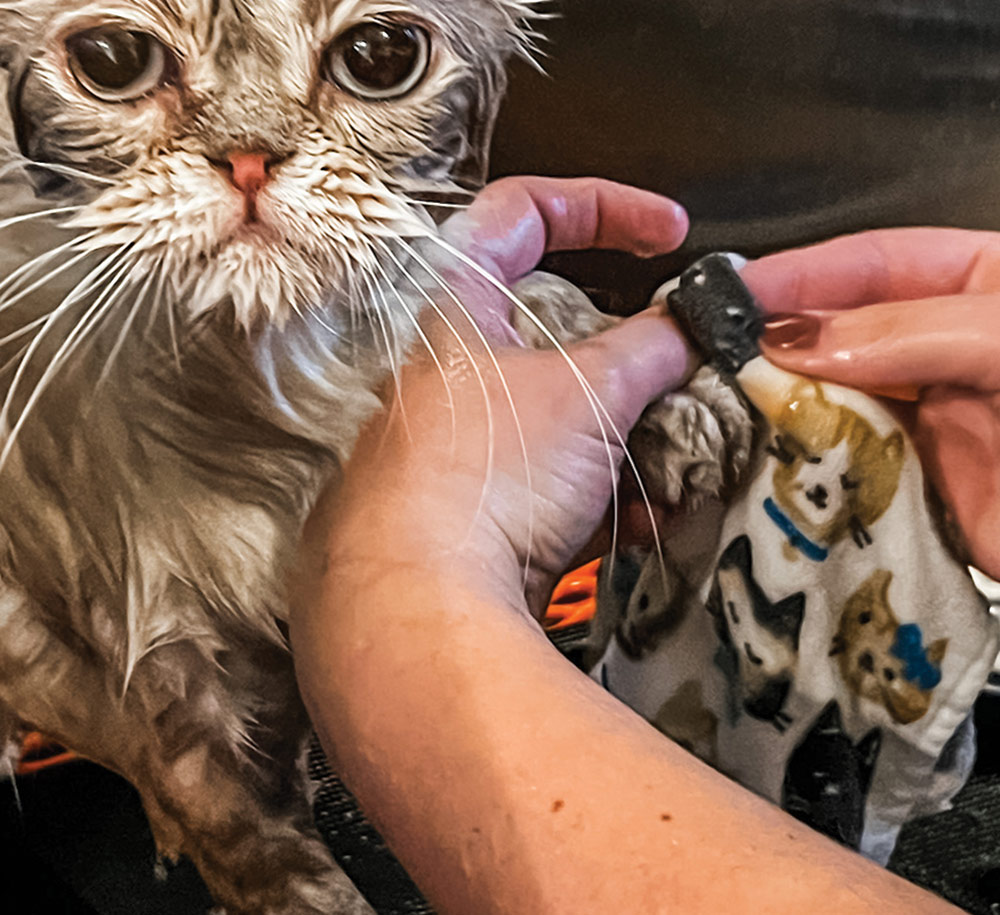
FIG 5) Too much scrubbing or exfoliating can irritate delicate cat skin. Start with the gentlest techniques possible, like using a washcloth or baby/soft toothbrush with a dab of degreasing shampoo to remove the oil buildup around the nail beds. Express each nail to get all the way to the base of the nail and around the nail bed.
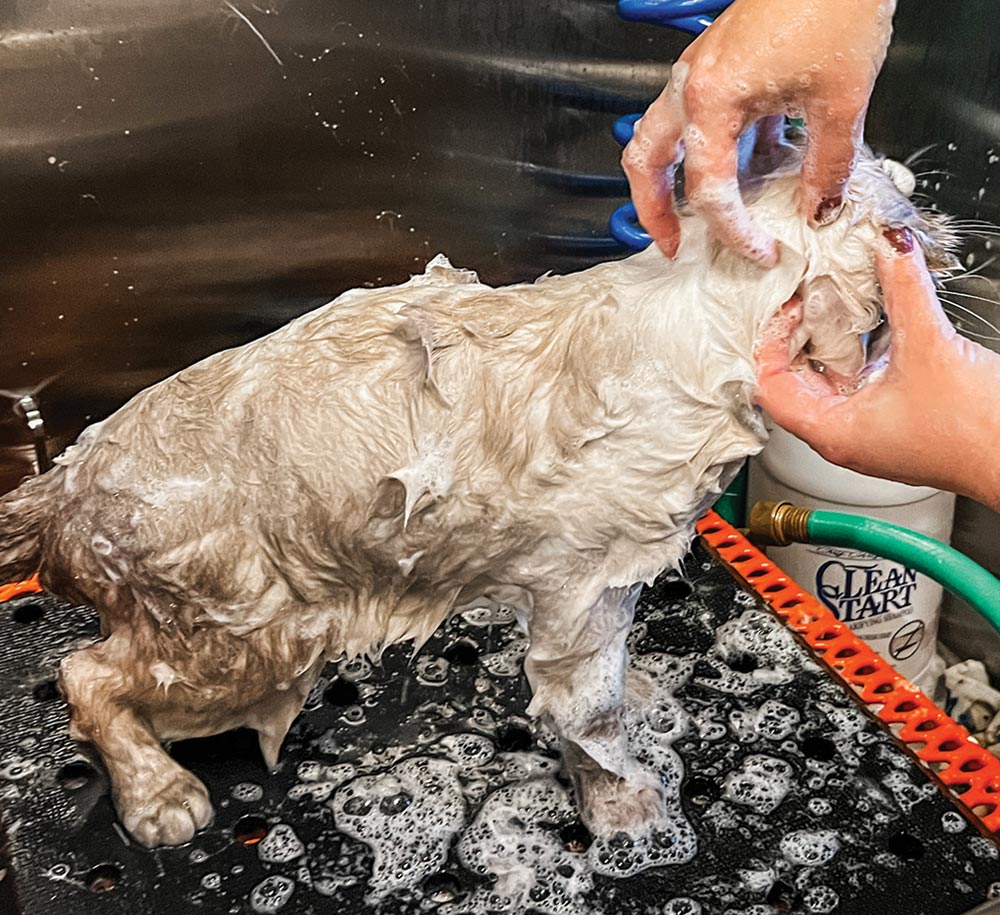
FIG 6) Dilute coats like Cooper, who is a Lilac Lynx Point, tend to be fuzzier and softer than dominant coats. In Cooper’s case, this means he sheds quite noticeably and really benefits from a regular grooming schedule to manage his shedding. I use a three-step process for his bath. A face-friendly shampoo is used around his head and ears, being sure to massage behind and beneath his ears, as they can be quite greasy. Then I use a degreasing shampoo all over the body, legs and tail. Finally, a clarifying shampoo is used as the second wash all over the body to make sure he is squeaky clean. This combination of warm water, scrubbing with the two shampoos and a thorough final rinse will encourage as much dead hair as possible to come out during drying.
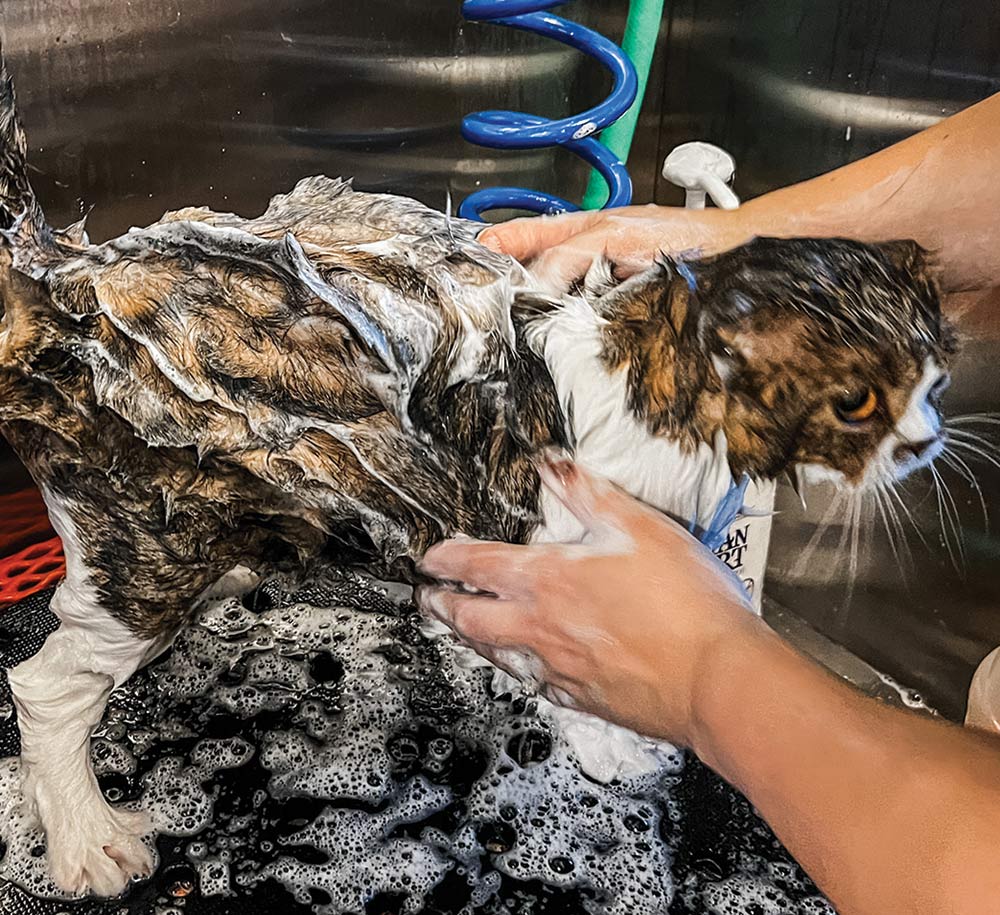
FIG 7) While Moose is a dominant color coat, a Brown Tabby and White, he isn’t as fuzzy as his brother, but that doesn’t mean he isn’t a hairy beast too! Every few grooms I will swap the clarifying shampoo for a color-enhancing shampoo which makes his striking markings and white patches really pop.
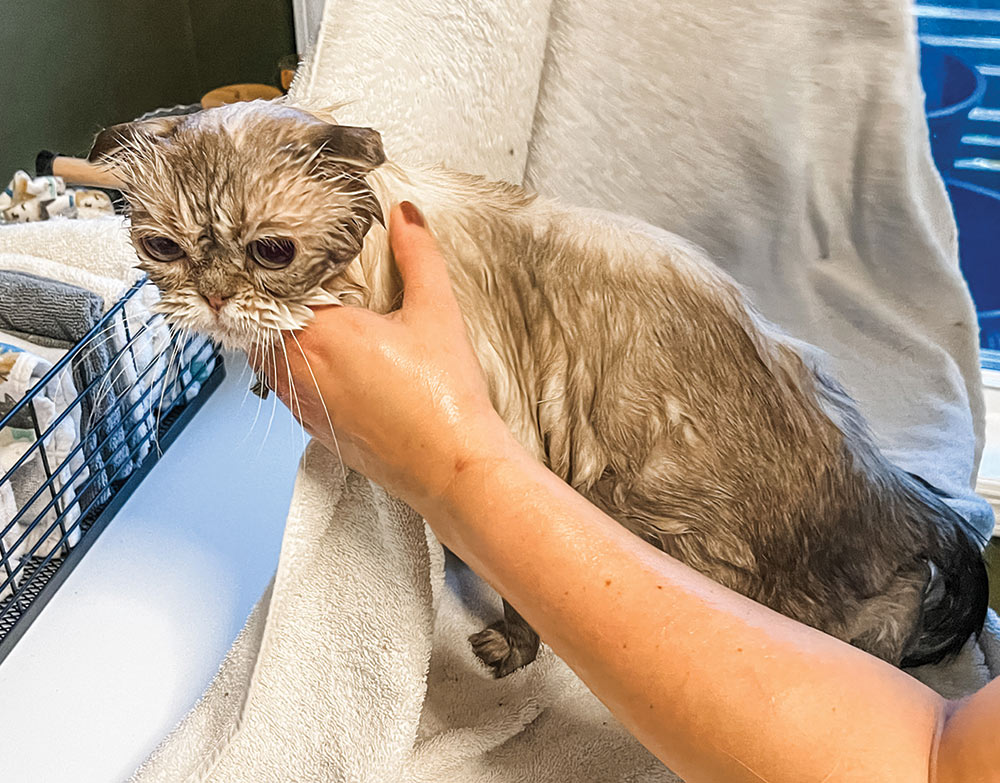
FIG 8) After the bath, I wrap each cat in a large, fluffy towel. I use a “burrito-style” wrap where I start by having them stand in the middle of the towel and drape the edge of the towel over their front legs. Then I take one long side, wrap over their body and tuck the ends under their front legs. This uses the cat’s body weight while standing to keep the towel snug around their body. Then I wrap the second long side over a bit looser.
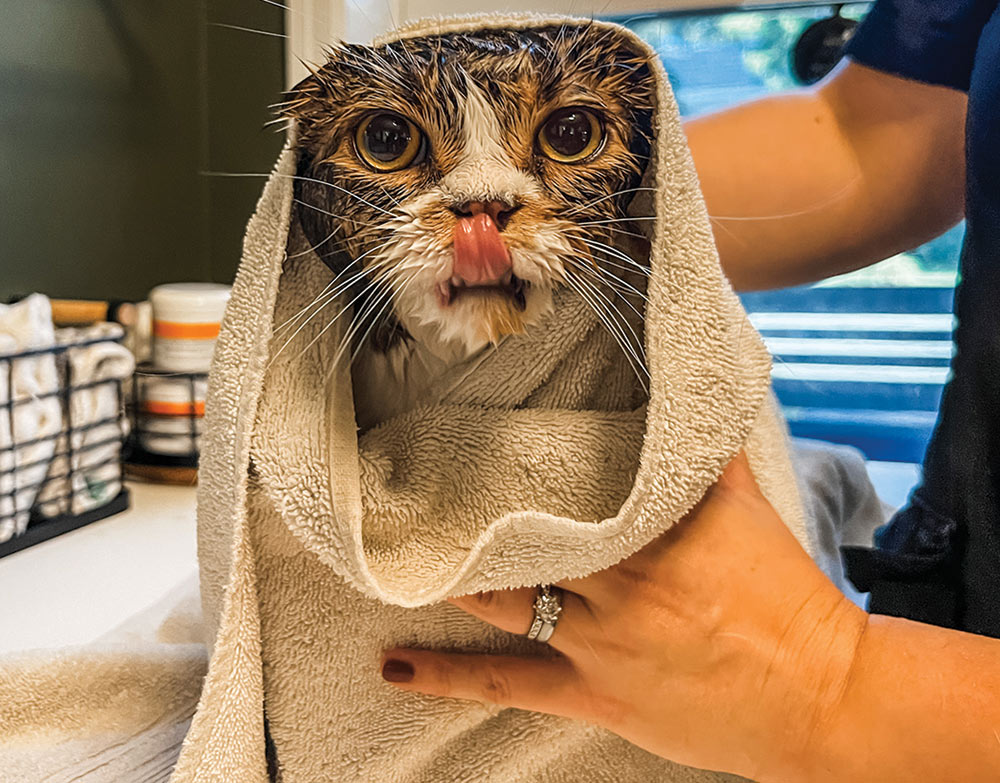
FIG 9) Keeping a loose section of towel gives me a bit to wipe around their head and face, or I can use a clean washcloth or microfiber cloth.
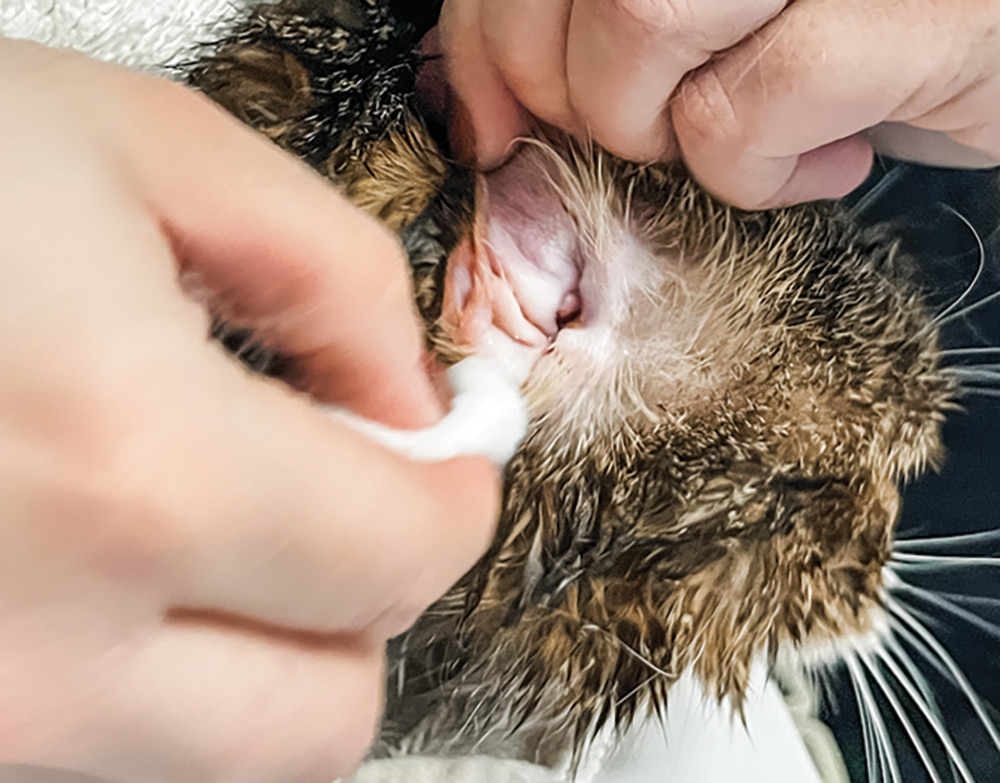
FIG 10) Scottish Fold ears can accumulate skin oils and ear wax due to the shape of their folded ears. Being gentle while handling their ears, I make sure to open up the outer ear canal as much as I safely can in order to clean with cat-safe ear cleaner and cotton balls.
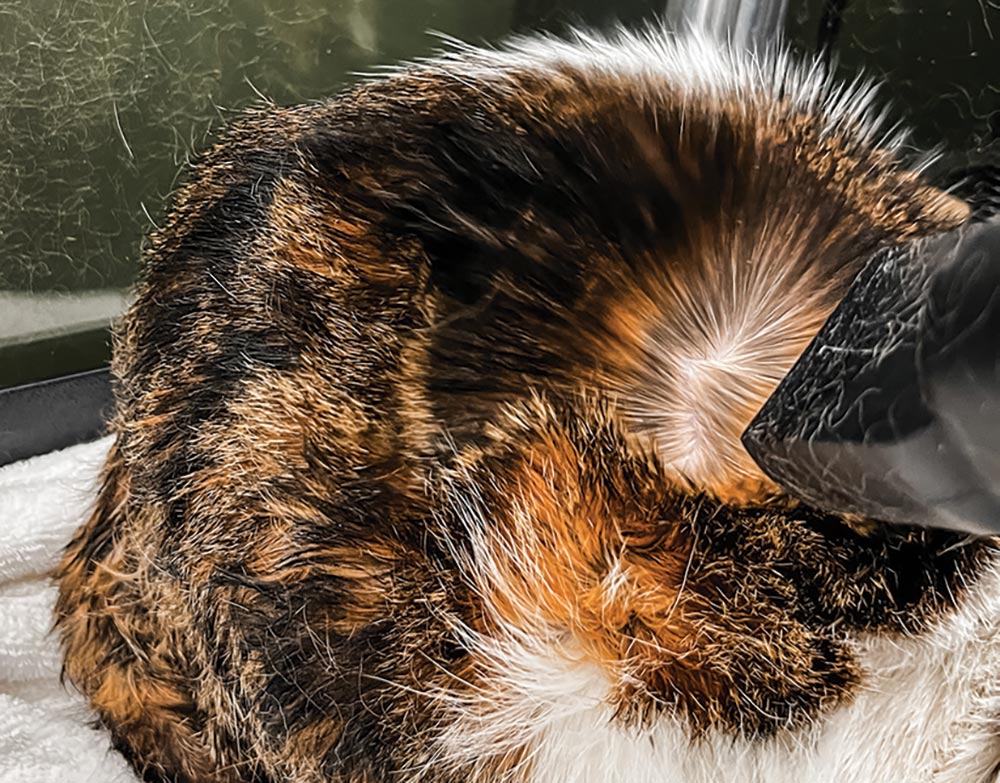
FIG 11) Because Moose and Cooper are regulars at my salon, I can start their blow-dry with a water peeler nozzle without causing them to become upset. For a first-time cat, I will start with no nozzle and a lower dryer flow to more slowly introduce the loud noises. With cats that noticeably shed a lot, the water peeler nozzle does a great job “blasting” out loose, dead hair without irritating skin.
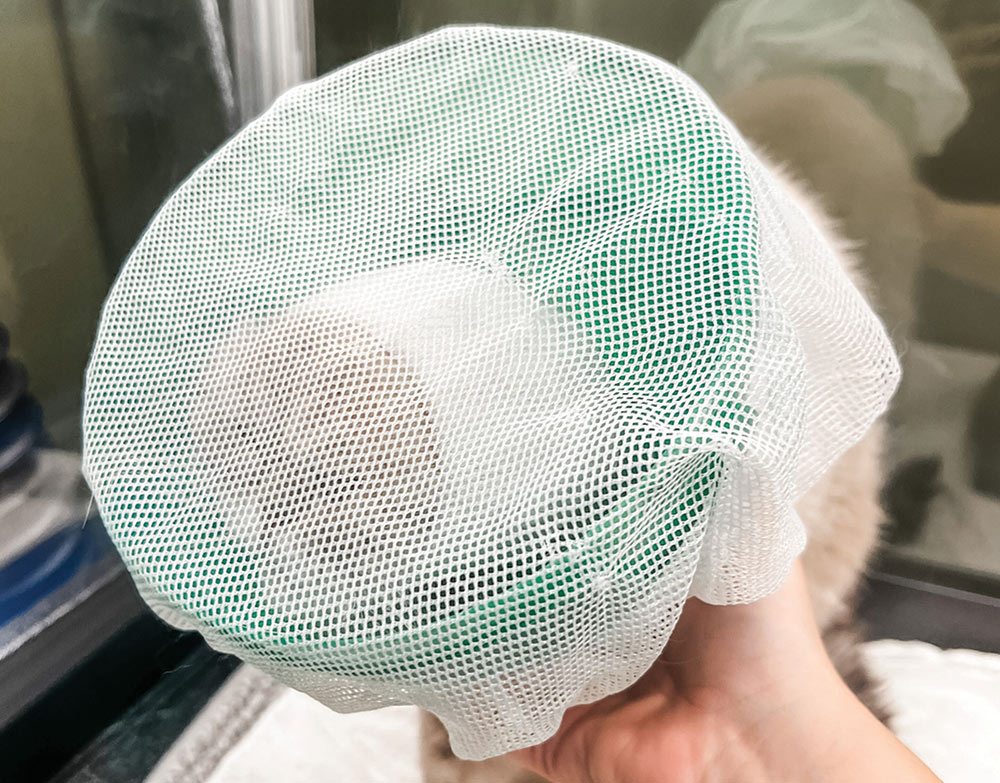
FIG 12) To also protect the cats from flying fur balls, I will use a mesh shower cap over the edge of an Elizabethan collar to keep excess hair out of their face while blow-drying.
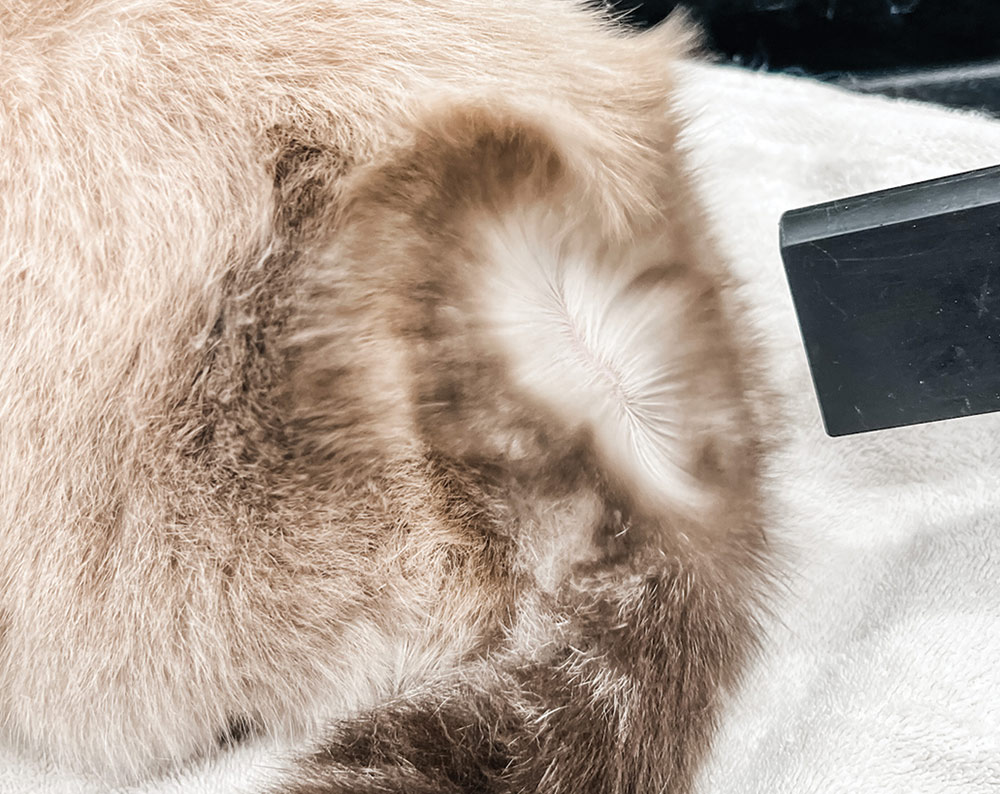
FIG 13) When blow-drying, focus on drying from the skin out. This helps to push hair that is already dead out while also making sure the cat is getting thoroughly dried. If any area of the coat feels slightly cool to the touch, it means it is not yet dry. I prefer HV dryers that do not have a separate heat element. The air should be slightly warmed from the motor running, but not hot.
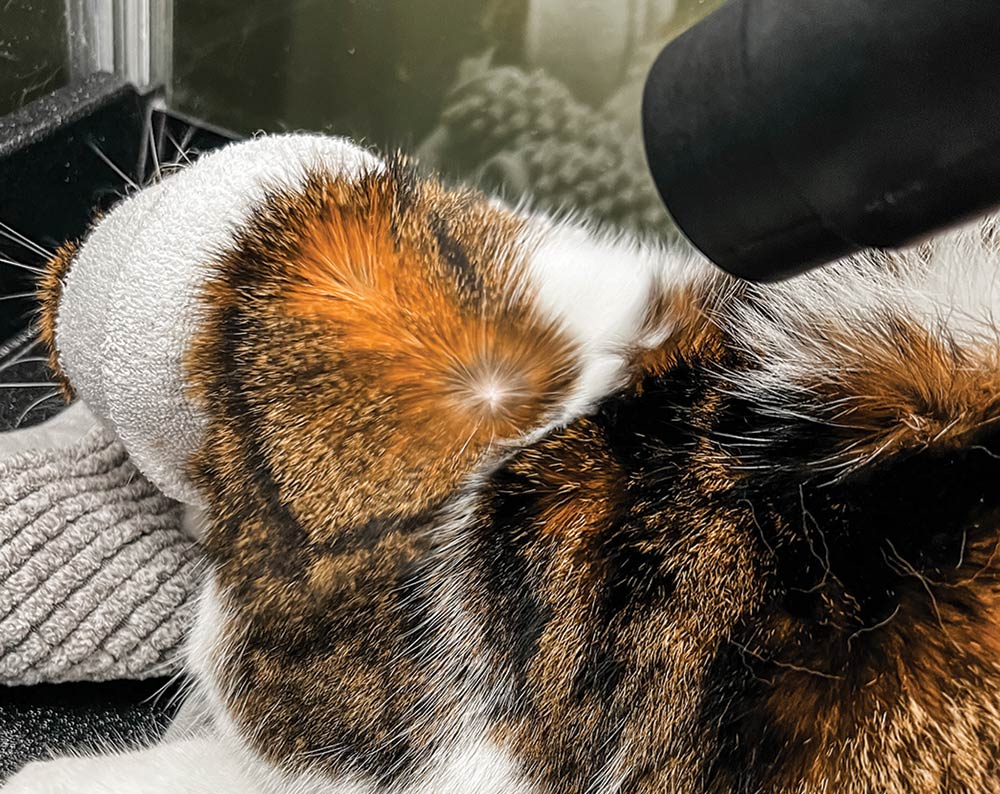
FIG 14) After using the nozzle to get the coat about 90% dry, I will remove it for the last bits of drying. The wider mouth of the dryer hose means a bit more warmth and less air flow, which is better for finish drying and doing around the head. As I move towards the head, I’ll start to roll the Happy Hoodie forward. This way I can dry underneath it, while still covering their ears and face. Once it’s off, be sure not to aim the dryer hose directly into their eyes, ears, nose or mouth. Always come from behind the head to dry around the ears, cheeks and forehead, or angle underneath to dry the chin and neck.
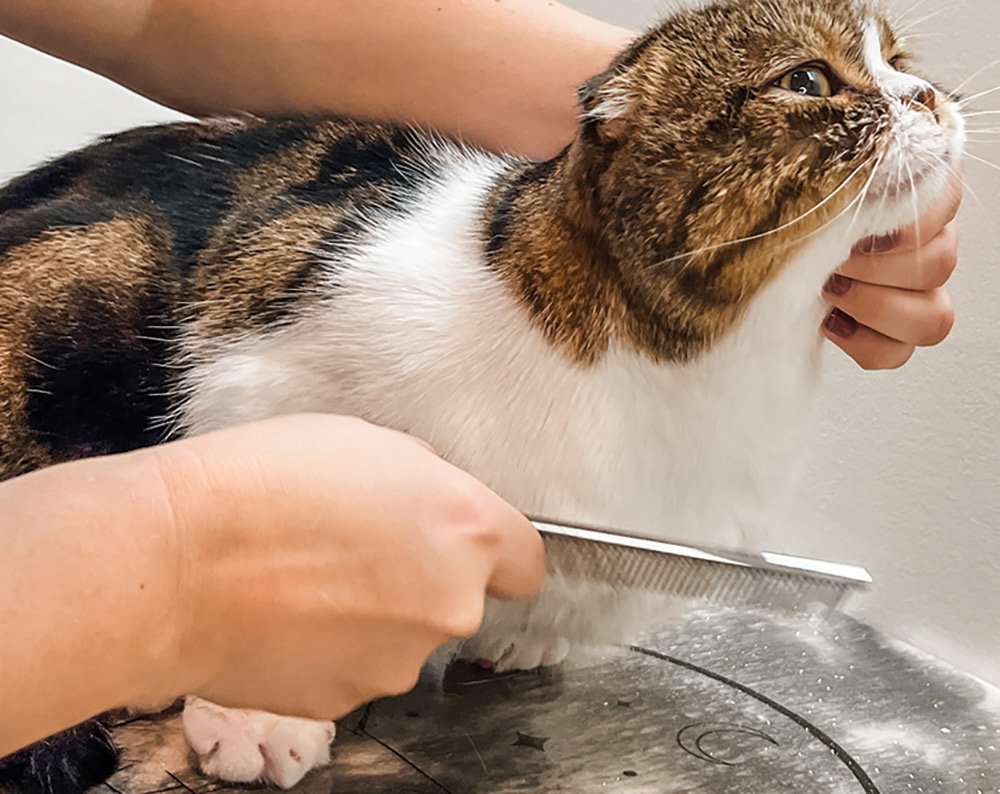
FIG 15) Once dry, I use a large metal comb all over the cat’s body, chest, belly, legs and tail. Comb with the direction of the coat and use short strokes to remove any clumps or tufts of remaining dead hair.

FIG 16) After the larger comb glides through the coat easily, I’ll repeat the process with a finer-toothed deshedding or cat comb to get the final hairs that are ready to come out. A small face/feet comb is used around the head and legs, as those areas can have short, dense hair prone to clumping if not thoroughly combed out.
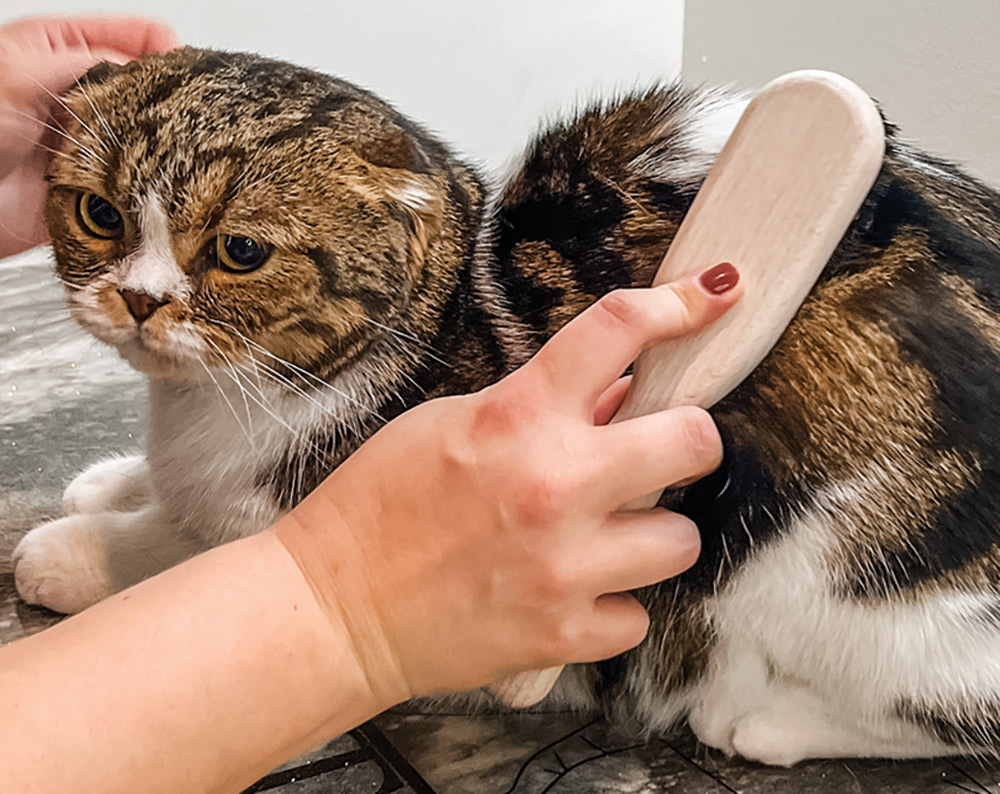
FIG 17) For shorthaired cats, I’ll finish with a boar bristle brush going with the direction the hair grows. This helps to evenly distribute any finishing spray or light fragrance, and can catch any lingering loose hairs or dandruff flakes.


